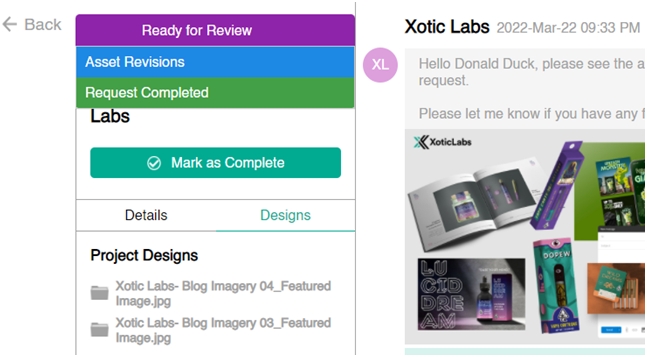
The Project Page is where you will manage all of your individual projects and communicate with the designers.
Features of Project Page:
- Project status management
- Designer communication
- Provide feedback on design submissions
- Download design files
Project Overview
The project overview is the window on the left hand side of the project page. This area contains all of the project details, status, and design files.
Project Status
View or change the status of your project to manage your workflow or complete the project.
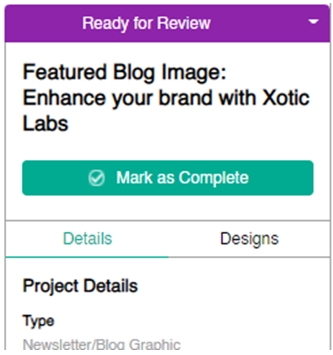
Details
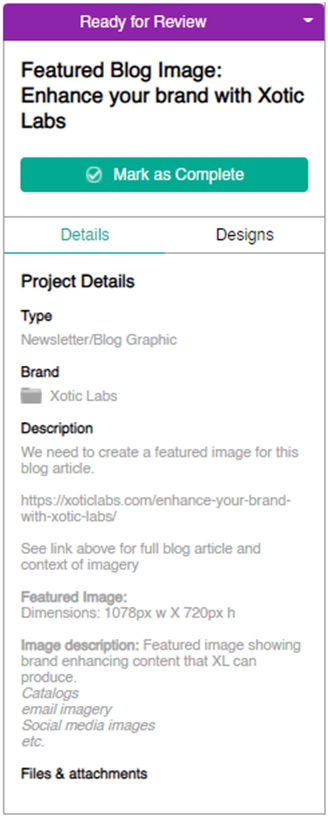
Review the Project Details on the ‘Details’ tab. The information shown here is what you added when you created the project. This includes and file attachments you loaded up as a reference.
You can edit your project at any time and the updates will be reflected here for the designer to review.
Project Status
Project status is an essential part of managing the workflow of your request with the designer.
Here is an overview of the Project Status’.
Assigned to Team Not Started
Description: This is to indicate an Active project started by the Client has not started the design process, but has been assigned to a designer.
Color: Red
Allow manual transitions to the following statuses only:
First Draft in Design:
Permissions: (designer can set it to ‘First Draft in Design’)
Asset on Hold:
Permissions: (client can move the project to on hold at any time)
How is status set: When a new project moves from the Client’s Queued projects to Active projects. The status will be automatically set to ‘Assigned to team not started’.
Who changes status: The designer is responsible for updating the status to ‘First Draft in Design’. This lets the client know that their project is actively being worked on.
Project location on project board:
Client: Active tab in the ‘Active Section’
First Draft in Design
Description: This status indicates that the first draft of the project is actively being worked on by the designer.
Color: Light Blue
Allow manual transitions to the following statuses only:
Ready for Review:
Permissions: (only Designer can move the project to ‘Ready for Review’ when the project has been submitted.)
Asset on Hold:
Permissions: (client can move the project to on hold at any time)
How is status set: When the Designer starts working on a new project, they will select this status to indicate to the Client they are actively working on their first draft.
Who changes status: The Designer is responsible for changing the status to ‘Ready for Review’ when they have submitted their first design file.
Project location on project board:
Client: Active tab in the ‘Active Section’
Ready for Review
Description: This notifies the client that the project has a submission and is ready for review. When the designer submits a design, the status is set to “Ready for Review”.
Color: Purple
Allow manual transitions to the following statuses only:
Request Completed:
Permissions: (Client)
Asset Revisions:
Permissions: (Client)
How is status set: When the designer submits their designs, they will set the status as Ready for Review.
Who changes status: The Client is the only one who will move the status out of ‘Ready for Review’.
Project location on project board:
Client: Active tab in the ‘Active Section’
Asset Revisions
Description: If the client doesn’t approve the design submitted by the designer, they will mark the status as Asset Revisions after they are finished making their comments. It will stay in this status until the designer submits a new design submission and the status changes to ‘Ready for Review’. This process continues until the project is marked “Request Completed” to be moved to the Completed tab.
Color: Blue
Allow manual transitions to the following statuses only:
Ready for Review:
Permissions: (only Designer can move the project to ‘Ready for Review’ when the project has been submitted.)
Asset on Hold:
Permissions: (client can move the project to on hold at any time)
How is status set: After the project is ‘Ready for Review’ if the customer has any revisions, this status will be set to indicate to the designer more work is needed.
Who changes status: The Designer is responsible for changing the status to ‘Ready for Review’ when they have submitted their first design file.
Project location on project board:
Client: Active tab in the ‘Active Section’
Request Completed
Description: The client will mark the project as Request Completed when the project is done and they are satisfied with the design submission.
Color: Green
Allow manual transitions to the following statuses only:
How is status set:
Who changes status:
Project location on project board:
Client: Completed Tab
Asset on Hold
Description: At any time, the client can defer the project and move it to the draft tab and put the project on hold. Putting the asset on hold will pause the project and move it to Drafts, not move it to the Queue.
Color: Yellow
Allow manual transitions to the following statuses only:
Assigned to Team Not Started: (Client can make the project active which will begin the same workflow as creating a new project)
How is status set: At any time, the client can defer the project and move it to the draft tab and put the project on hold.
Who changes status: The client is able to move a project On Hold to an Active status at any time. Moving an On Hold project to Active will start it in the same workflow as a normal active project where it gets added to their design Queue or made as an Active project if there is space in their allowed requests.
Project location on project board:
Client: Drafts tab
Draft
Description: The project can be in draft status until it is launched and added to the Queue or Active projects for the client.
Color: Grey
Allow manual transitions to the following statuses only:
Assigned to Team Not Started: (Client can make the project active which will begin the same workflow as creating a new project)
How is status set: When a customer is creating a new project, they can set the project to Draft Status.
Who changes status: The client is able to move a Draft project to an Active status at any time. Moving a Draft project project to Active will start it in the same workflow as a normal active project where it gets added to their design Queue or made as an Active project if there is space in their allowed requests.
Project location on project board:
Client: Drafts Tab
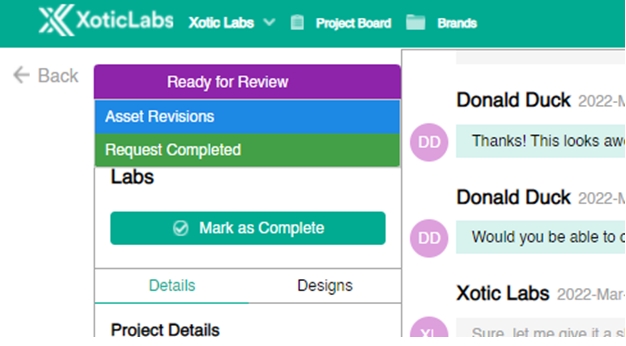
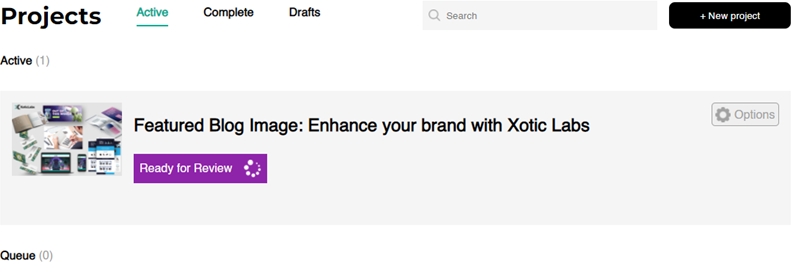
The project status for your project is also reflected on the main Project Board for easy reference.
Designer Communication
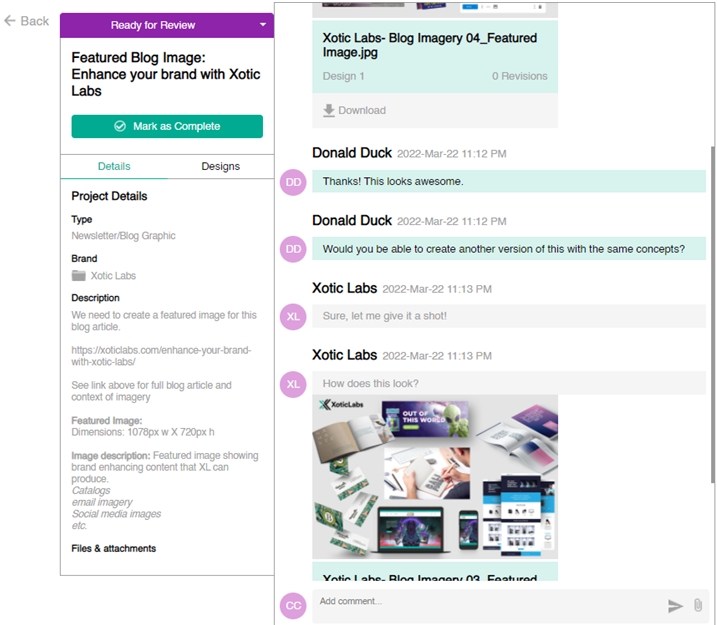
Communicating with your designer has been made easy through the Chat feed on your Project Page. At any time during your project, you can make comments and provide feedback to your designer regarding your design request.
You can upload additional reference files by attaching a file to your comment. These files will be seen by your designer and saved in the ‘Details’ tab under ‘Files & Attachments’ section of the Project Overview area.
Submitted Designs
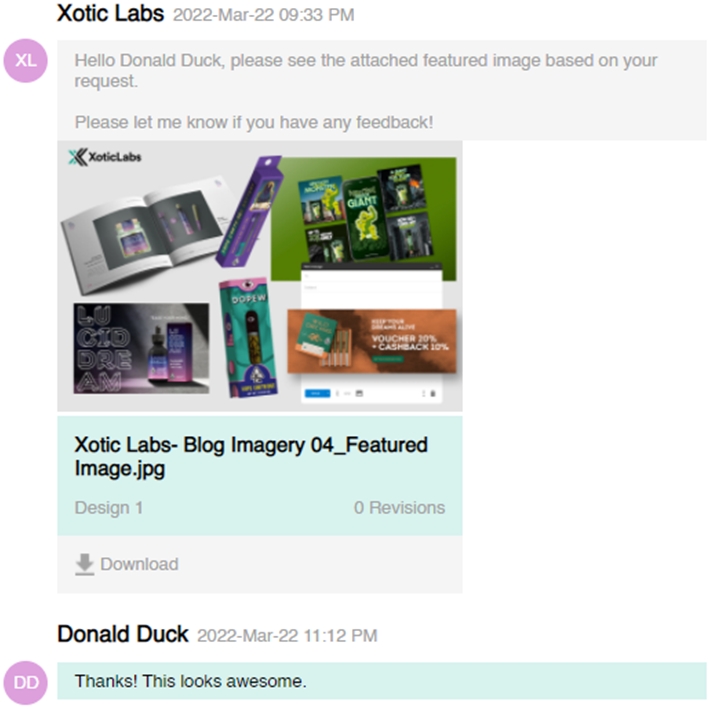
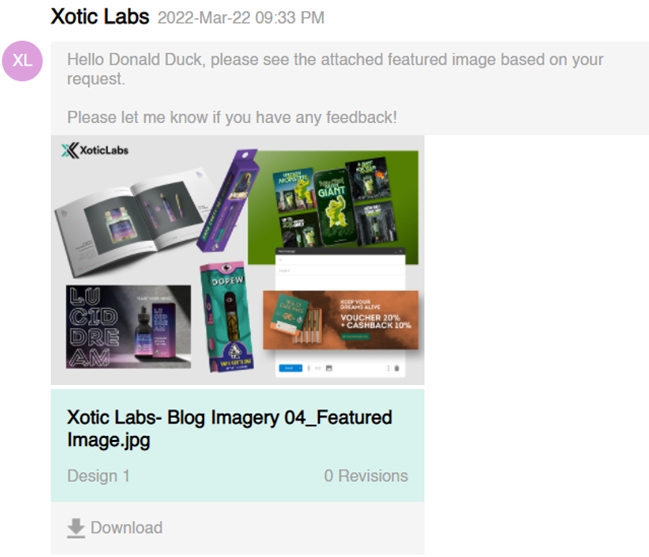
Whenever a designer submits a design for review, the following information will be displayed.
Design: The number shown here is the design version that has been submitted for this project. If 3 design versions have been submitted, you will be able to see that.
Revisions: This number reflects the number of times this specific design version has been revised. Design 1 may have been changed 3 times based on the comments you made previously. The file uploaded will reflect this.
Download: This button allows you to download and save this specific design file for your records.
Commenting on submitting designs
When a designer submits a design for review, you can either make general comments in the main chat feed, or you can make notations directly on the file itself.
To do this, navigate to the design you’re wanting to comment on and select ‘View Design’ after hovering over the image.
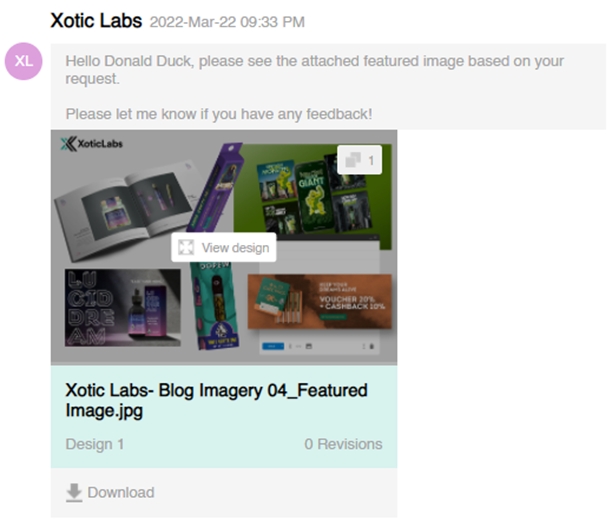
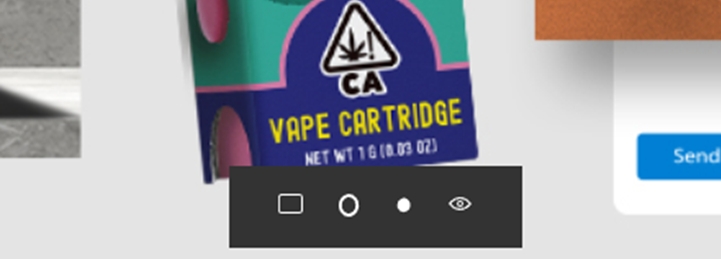
Clicking ‘View Design’ will bring you to a new window with the file displayed along with notation tools that can be found at the bottom of the image page.
Select a comment tool and highlight the area you wish to comment on. After selecting your area, make your comment and press submit.
Your designer will now be able to see the specific call outs and revision requests you make.
Comment Tools:
Square selection
Round selection
Dot marker
Hide comments
Downloading design submissions
As long as you have an active account, at any point during the design process, you can download any of the submitted design files provided by the designers.
You can also access any of your design files from your completed projects when your account subscription is on Pause.
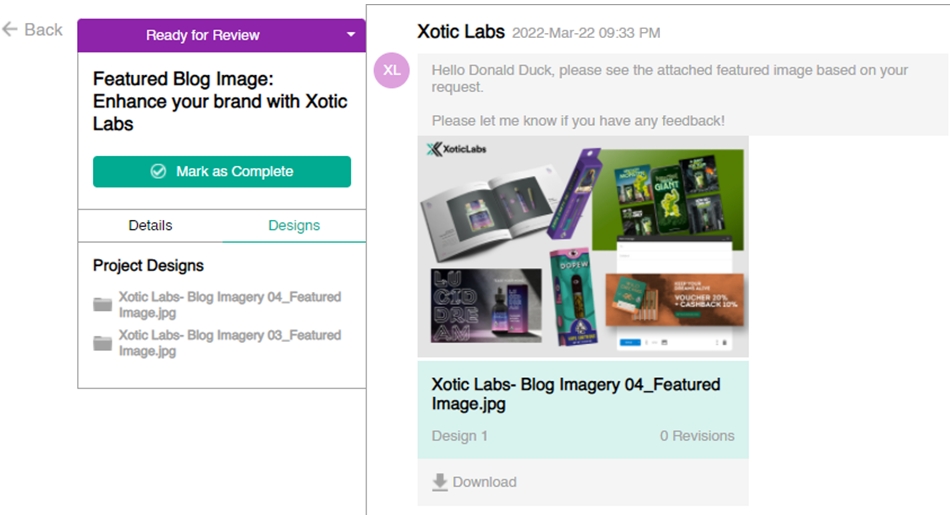
Step 1. Navigate to the project page.
Step 2. Select the ‘Designs’ tab in the Project Overview sidebar
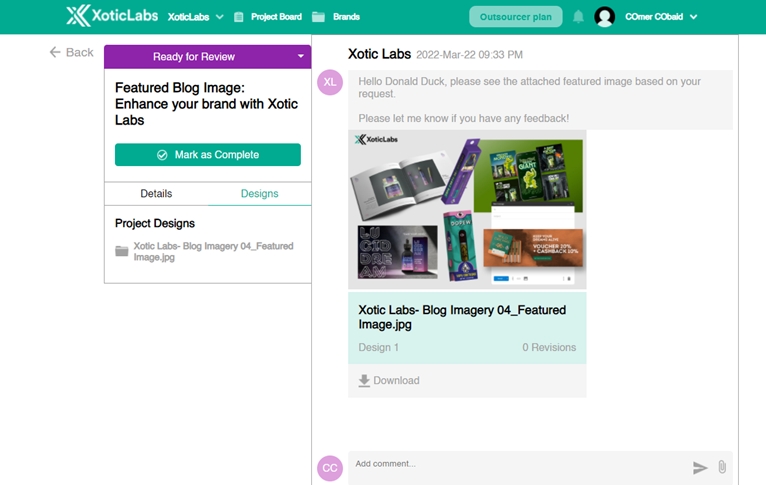
Step 3. Choose the design file you want to download.
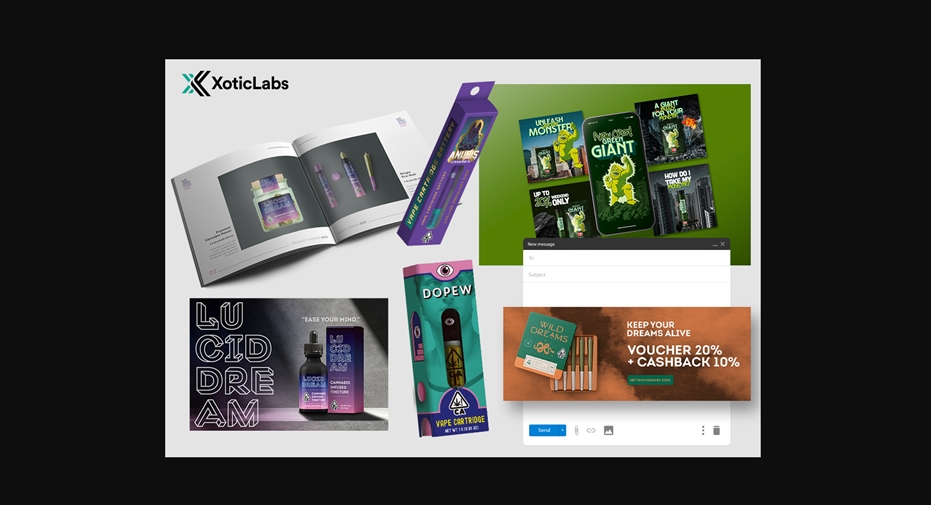
You can also download any design file directly from the chat feed by clicking the ‘Download’ button on the image you’re looking for.
Completing a Project
At any time, you can mark a project as completed to finish it and make room for your next design request.
Completed projects will be moved to the ‘Complete’ tab on your project board. You will still have access to all of the design files and can even re-open the completed project if you need to work on it again.
Mark a project as completed using the Status Dropdown or selecting the ‘Mark as Complete’ button on the Project Overview section.
